Before I start, I’m just going to say that if I can do this with WordPress, then it can be done with anything.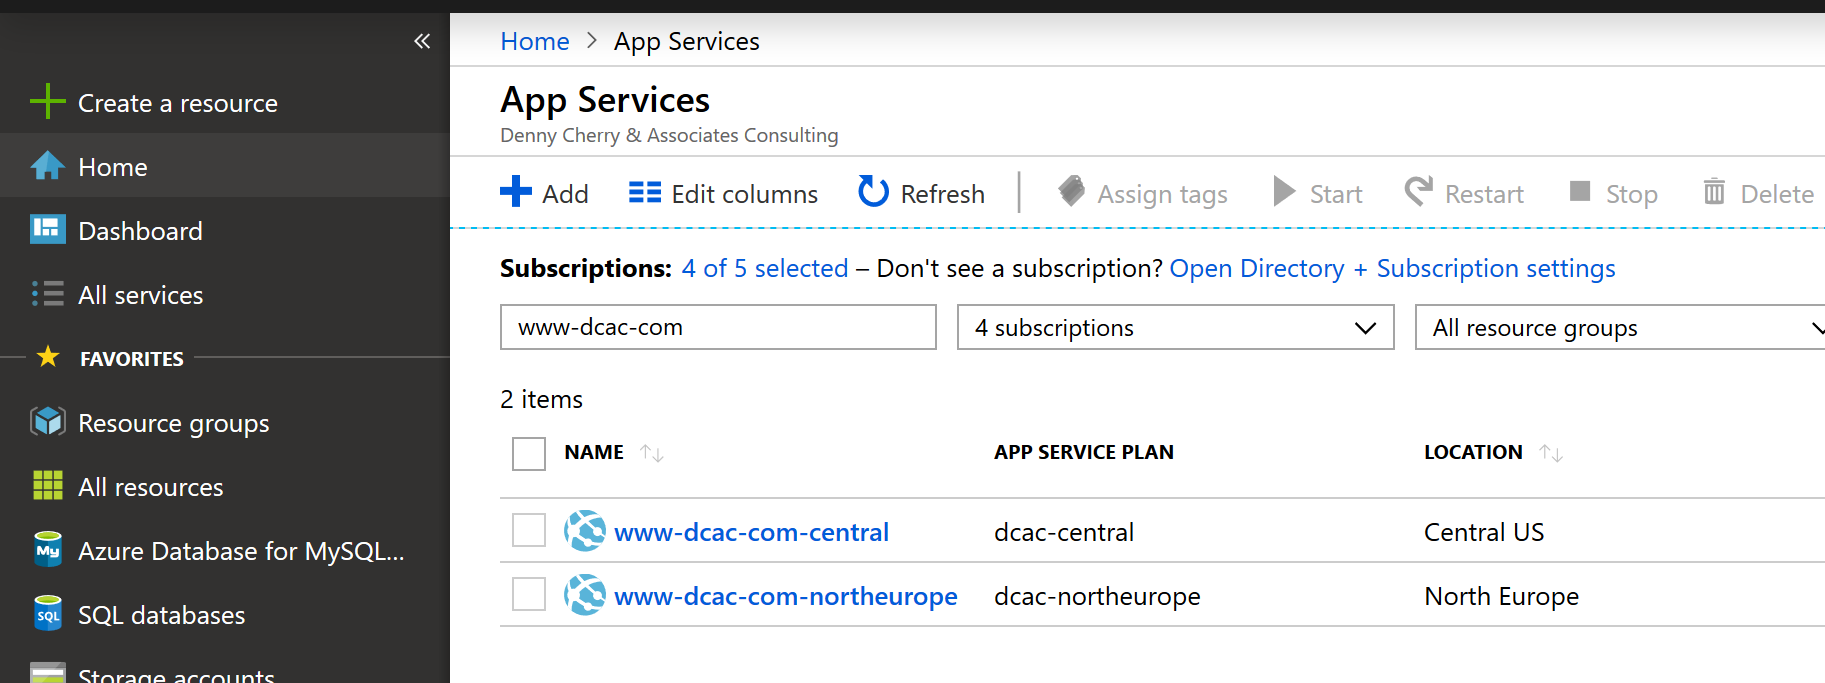
The goal that I was going for to have a WordPress website that was running on multiple contents (I only used two regions, but this can be scalled out as needed to other regions as needed) so that responce time on one site of the planet would be similar to users of the site that are on the same side of the planet as me. I also wanted the failover for all of this if an Azure Region goes offline to be as quick and painless as possible.
Here’s what I had to get setup. I setup two Azure WebApps both of which were running Windows. One was setup in US Central while the other was setup in North Europe.
Website Failover
I tried doing this with Linux WebApps, but some of the underlying functions that I needed to make this all work. Specifically I needed Site Extentions, which are only available on Windows WebApps today.
After setting up the two web apps, I uploaded the website content to the Azure WebApp. Once the site was uploaded, and the custom DNS was working on the WebApp it was time to start making the replication of the web traffic work.
In a new web browser I opened the .scm.azurewebsites.net version of my site. To get the SCM site it’s http://{Azure WebApp}.scm.azurewebsites.net. Since my Azure WebApp is named www-dcac-com-central by SCM site is https://www-dcac-com-central.scm.azurewebsites.net/. (There’s going to have to go to this site a few times, so keep the URL handy.)
Be very careful of the order that you are doing the replication. If you setup the replication from a blank website to your website, then it’ll replicate the blank website. So before doing this, make sure that you have a proper backup on your WebApp BEFORE you configure the mirroring.
One you have the website open click on the Site Extenstions on the right of the menu at the top. 
You’ll see a galary option. Select the galary option and find the “Site Replicator” extention. Enable this extention by clicking the plus sign. A window will popup to complete the install, click install.
Once the installation is complete, go back to the Azure portal. From the Azure Portal stop the WebApp and then Start it again (clicking restart will not work).
Again in the Azure Portal select the second site (in my case the second region is the North Europe region). From here you need to download the publish profile for the WebApp. To do this from the Overview option tab select the “Get publish profile” option from the top right.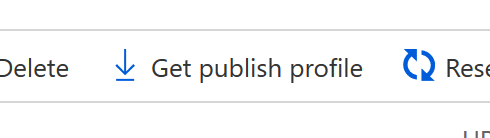
Just download the file, we’re going to need it in a second.
Go back to the first sites SCM website (https://www-dcac-com-central.scm.azurewebsites.net/ in my case) and click the play button on the Site Replicator extension.
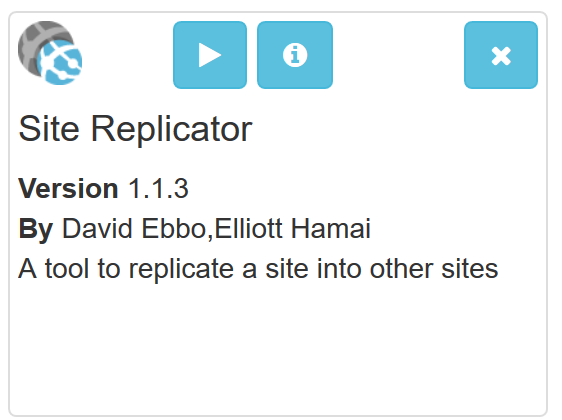 This is going to give you the configuration screen for the Site Replication (it may take a minute to open). The setting screen is pretty simple. There’s a browse button on the bottom left of the screen, click that and navigate to the publish profile file that you downloaded earlier.
Give the site some time to replicate all the changes to the other region. When it says “Succeeded” it should be just about done. The larger the website, the longer this will take. I FTPed into both WebApps and watched the files appear until they were all there. On a standard WordPress install, this took about 10 minutes.
Once this was all finished, I repeated the process in the other direction. I downloaded the publish file from the US Central version and configured the Site Replicator on the North Europe region; then I uploaded the publish file to the North Europe region. I then gave the process about 10-15 minutes to settle down and do any replication that needed to be completed.
Once this was all finished, I was able to upload files, pictures, WordPress updates, etc. from either site and the change would be replicated to the other region within a second or two.
Once the website replication was handled it was site to setup Traffic Manager. This would allow people to connect to their local version of our website depending on where in the world they are connecting from. Getting the endpoints setup was pretty simple. I used basic geographic load balancing and pointed North/Central/South America to the US Central version, and Asia/Europe/Middle East/Africa/Anti-Artica to the North Europe version.
The only hard part was that because WordPress is going to have a ton of redirects you can’t do normal HTTP monitoring.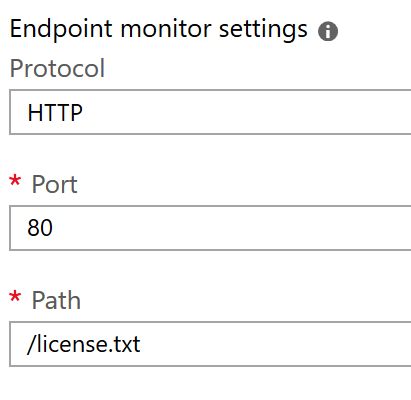 Normally you could have traffic manager pointing to “/” for the path to monitor, but WordPress didn’t like this. I changed the website to use “/license.txt” instead as the path as this would cause the traffic manager can come online correctly. It isn’t a perfect situation, but it works well enough.
Once everything is setup and traffic manager is happy and working, we can point public DNS to the site. In our DNS configuration for www.dcac.com we added a CNAME record to DNS. A CNAME record in DNS redirects the request to another record. In our case we pointed www.dcac.com to www-dcac-com.trafficmanager.net. This allows the Traffic Manager service to resolve www.dcac.com to the correct version of the website.
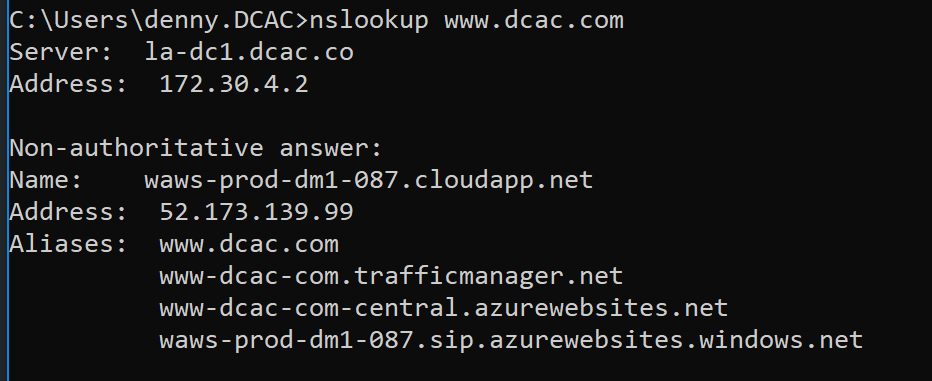
We can test that this is working as expected by looking at the output of the nslookup command.
By running nslookup on my laptop (which is currently sitting at my house in San Diego, CA), we can see that I’m resolving www.dcac.com to www-dcac-com-central.azurewebsites.net.
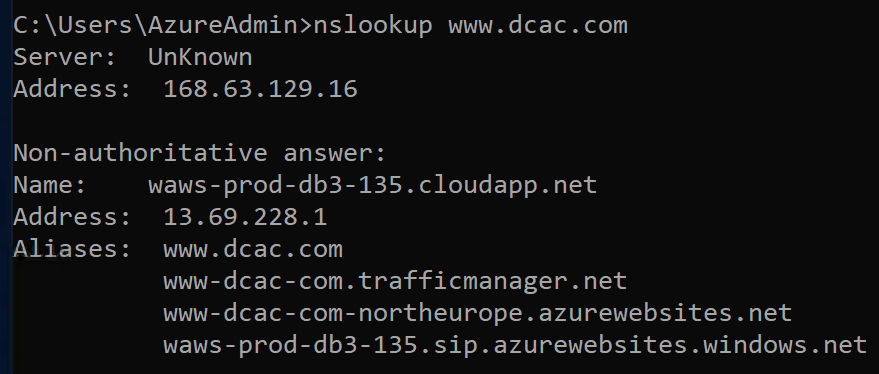
 If we do the same nslookup command from an Azure VM that’s running in Singapore, from the VM in Singapore when I do a nslookup on www.dcac.com I get back www-dcac-com-northeurope.azurewebsites.net.
 From these outputs, I can assume that I’m viewing the version of the website that’s closer to the user.
I’ve now got two duplicate copies of the website running in two different Azure Regions.
Database Failover
On the database side of things, need need to setup some replicate for that as well. “Azure Database for MySQL servers” now supports multi-region replicas but there’s no auto-failover available yet (hopefully it’ll be coming at some point soon). For the database copy I did basically the same thing as I did for the websites (and that I’ve done tons of times for Azure SQL DB).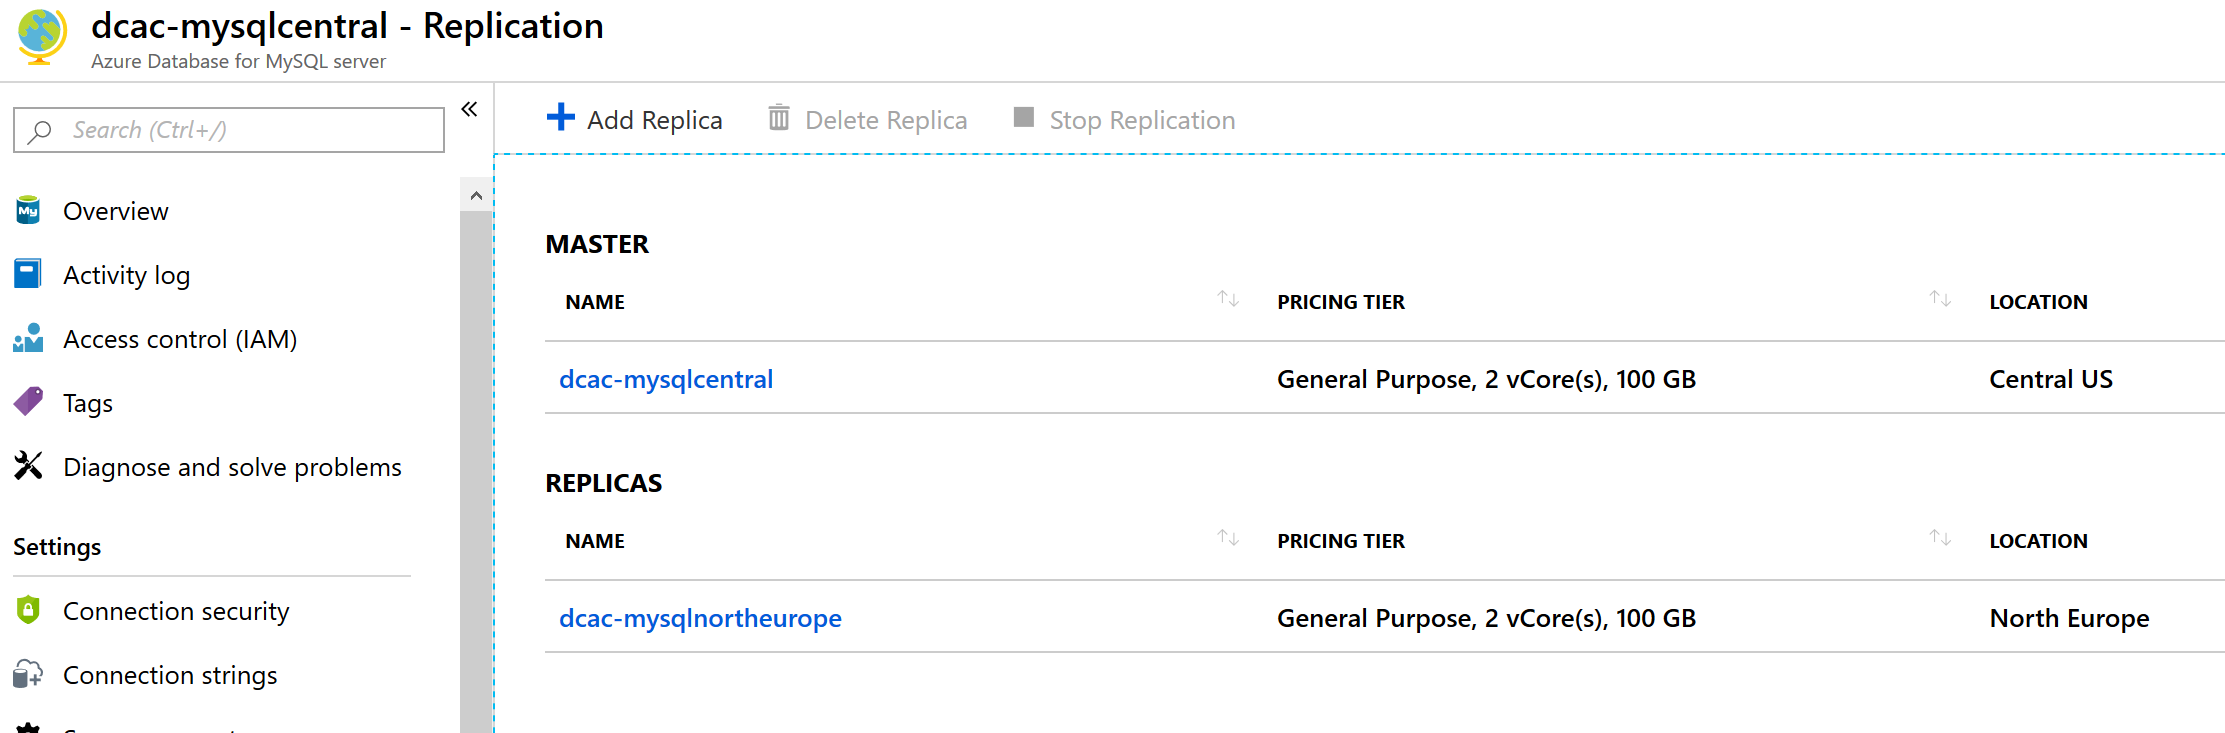
For the database side of things I setup WordPress to use the dcac-mysqlcentral copy. From there I clicked the Add Replica button, and that made a copy of the data to a new server called dcac-mysqlnortheurope that I setup in North Europe.
Since there’s no automatic failover at the database level today, if I need to do a failover I need to edit the wp-config.php file on the webserver, and that’ll kick the connection over to the other server. I also need to setup the needed PowerShell to do the failover. My next step of this process is going to be to setup some Azure Automation to handle all the database level failover, but so far this is a pretty good step as there’s not website level failover.
The End Result
The end result of all of this is that our website is setup and running in two different places for better availabililty and better performance of our application.
Denny
The post Making WordPress a globally distributed application on Azure WebApps appeared first on SQL Server with Mr. Denny.
One Response