A client came to be with a pretty scary problem. Their SharePoint site was totally down. The databases were there but the actual SharePoint farm was totally dead. All of the SharePoint tools said that the farm wasn’t configured yet so there were some pretty big problems. Thankfully they had a second SharePoint farm available so we decided to attempt to move the stuff from the broken farm to the new farm.
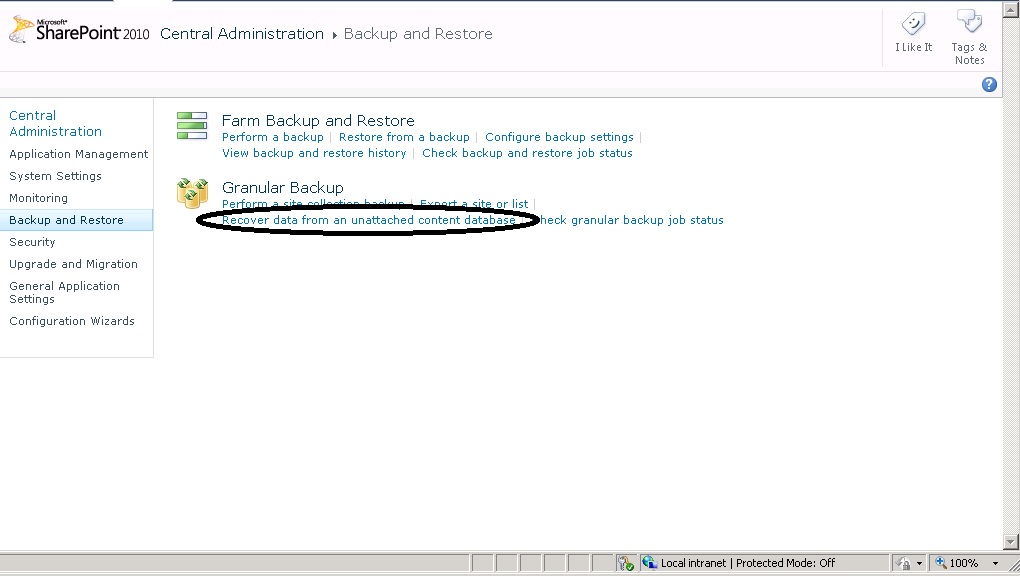
The first step was to backup the SQL Server database and restore it to the new SQL Server. No problems there, just a normal SQL Server backup and restore operation (just make sure that you don’t restore over an existing database). The next thing to do was to get the data from the SQL Server database that SharePoint didn’t know anything about into a SQL Server database that SharePoint did know about. This is done by going into Central Administration and selecting the “Backup and Restore” option. Then within the “Granular Backup” section selecting “Recover data from an unattached content database” as shown below.
Now go back into the Create
On the next screen give SharePoint the server, database and authentication information for the database you just restored. I then selected the “Export site or list” radio button at the bottom and clicked “Next”. The next screen allows you to select specific sites to export. In my case I wanted everything so I changed the “Site” drop down menu to “No selection” and entered a filename. I didn’t bother with security as we were changing Active Directory domains anyway. I left the default option of exporting all versions so that any version history would be maintained and clicked the “Start Export”.
Depending on how large the content database is you may have time for coffee, dinner or to take the weekend off.
When it was finished I discovered some really big annoyances. The biggest being that the template used for the old SharePoint farm was different from the template for the new SharePoint farm. This meant that I wasn’t able to import the data directly like I wanted to. The new farm was created using the template “SPSMSITEHOST#0” while the old farm was done using the template “ENTERWIKI#0” (I found this out when I tried to use the import-spweb powershell cmdlet to import the data).
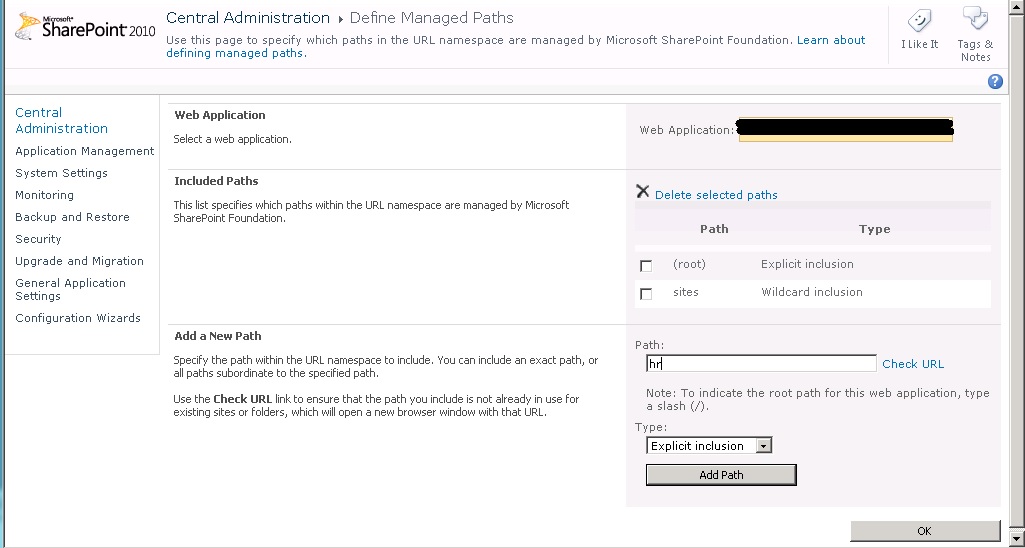
So in order to get the data imported as quickly as I could the solution that I came up with was to create new Site Collections for the 2 sites that needed to be restored. To do this you go into Central Administration and select “Application Management” from the menu on the left. Then under “Site Collections” select “Create Site Collection”. Now on the left half of the screen in the “Web Site Address” section you can click “Define Managed Paths”, do that and create a managed path for the URL you want, in this case /hr. The type of path should be Explicit inclusion as shown below.
After clicking Add Path then OK go back into the “Create Site Collection” screen. On this screen give the site collection a name, in this case “Human Resources” (you can imagine that HR wanted this back up quickly). Select /hr (or whatever you just created) in the URL field. For the template either select the template if you know what it is, or select the custom tab and choose “< Select template later… >”. Set the primary and secondary admins and the quota template as needed and click OK.
You’ve now prepped the production SharePoint site to accept the data. Now comes the really annoying part. There’s no way to import (that I could find) just part of the site from the backup file as I didn’t want a site collection but rather a subsite. In order to get just a subsite into the backup file I had to create a temporary web application (another TCP listener) for SharePoint that was separate from the main site. This is also done from Central Administration by clicking on “Application Management” from the left hand menu. Then on the right under “Web Applications” click the “Manage web applications” link. From here you can create a new Web Application by clicking the new button at the top left of the screen. Give it the TCP port and the IIS web site name as needed with the needed security information based on your companies policies. You’ll then need to go into Application Management and under Databases use the “Manage content databases” link to add a content database to the new Web Application. You can then restore the entire old SharePoint site to this new temporary Web Application by using the import-spweb powershell cmdlet as shown below.
import-spweb http://site:port -Path ‘c:backupsYourBackupFile.cmp’ -force
Once that is done we can now backup just the specific sites that we want to move. Go back into Central Administration and select “Backup and Restore”. Under “Granular Backup” click the “Export a site or list” link (you can see it in the first screenshot above). In the backup screen select the Site Collection and Site that you want to copy to the new farm, specify a filename to backup to (I used c:denny_backupshrhr.cmp) and click “Start Export”. Once it’s finished use import-spweb to import the data into the production site as shown below.
import-spweb http://site/hr -Path ‘c:denny_backupshrhr.cmp’ -force
Repeat this last paragraph for each site that you need to move (and that you have already created site collections for.
Needless to say when this was all done the client was happy because everything was back up and running (after doing a little bit of DNS changing) so all and all it was a successful day.
Denny
One Response