If you are using Power BI to connect to a PaaS resource on a virtual network in Azure (including private endpoints), you need a data gateway. While you can use an on-premises data gateway (the type of Power BI gateway we have had for years), there is an offering called a virtual network data gateway that is currently in preview.
The VNet data gateway securely communicates with the data source, executes queries, and transmits results back to the service, just like the on-premises data gateway. But it doesn’t require us to provision a virtual machine in the same network (or a peered network) of our Azure data source.
What to Know Before You Start
There are a few limitations to be aware of before you use a VNet Data Gateway.
- While in public preview, Virtual network data gateways are available only in workspace configured with a license mode of Power BI Premium, Premium Per User (PPU), or Power BI Embedded. If you are sticking with Pro licenses, you aren’t currently able to use VNet data gateways.
- VNet data gateways are not available in all regions. The gateway has to match the region of the target VNet but not your Power BI home region. That being said, there are some regions currently missing from the list, such as West US 3, Canada East, South Africa West, and all sovereign regions.
- Power BI dataflows and datamarts are not supported.
- Your VNet must be in the same tenant as the Power BI tenant containing VNet data gateway.
There are some other limitations, which you can read about here, but the four above were the big ones for me.
Creating Your virtual network data gateway
You can create a VNet data gateway in PowerBI.com. You may also need access to your Azure subscription. There are three steps to creating a VNet data gateway:
- Register Microsoft.PowerPlatform as a resource provider in the subscription containing the target VNet.
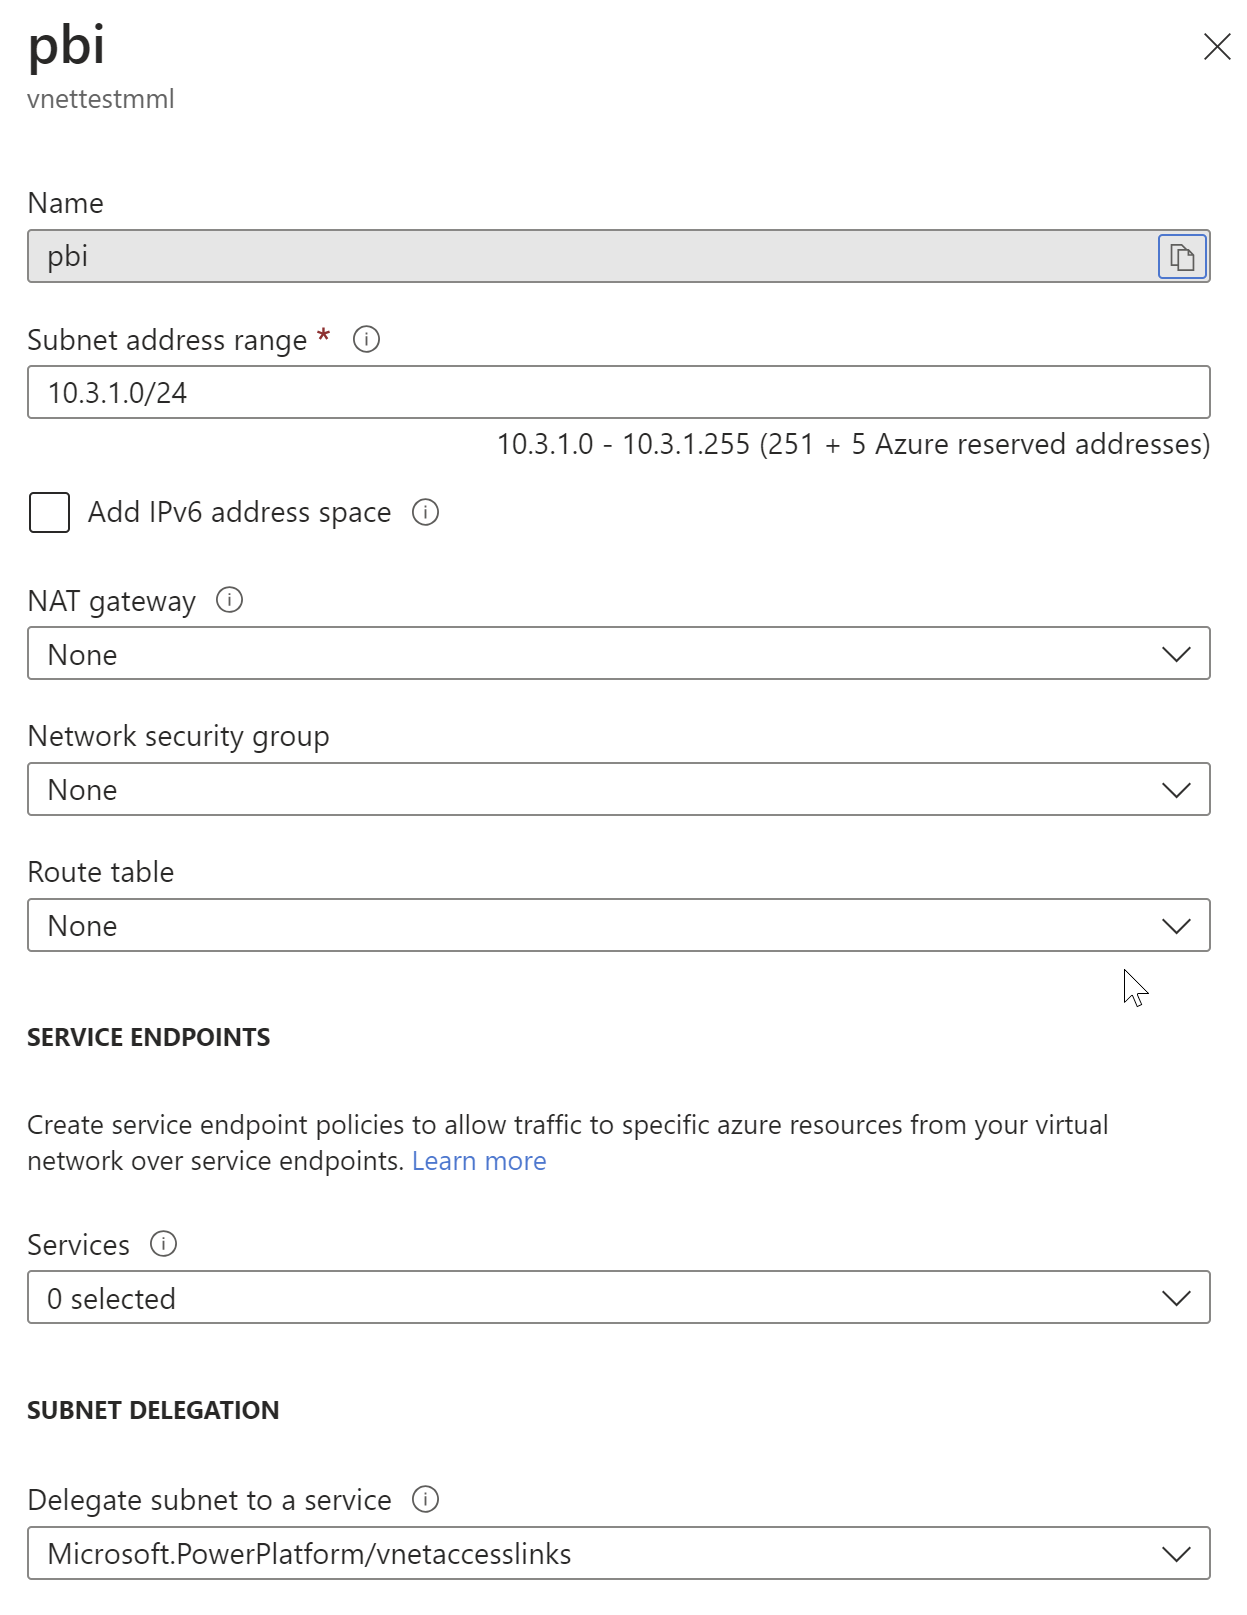
- Add a new subnet to your VNet and associate it with the Microsoft Power Platform.
- Create the VNet data gateway in Power BI or the Power Platform Admin center.
TTo register the resource provider, go to your subscription in the Azure Portal, select Resource Providers on the left, and search for “Microsoft.PowerPlatform”. If that provider is not registered, select it and choose Register.

On your target VNet, you’ll need to create a new subnet. During the creation of the subnet, make sure to set the Subnet Delegation to Microsoft.PowerPlatform/vnetaccesslinks.

If you did not successfully complete steps 1 and 2, you won’t be able to select the VNet and subnet in step 3.
To create the VNet Data Gateway in Power BI, go to the settings button, then choose Manage Connections and Gateways. The page will open on Connections, so you’ll need to switch to Virtual network data gateways.

After you click new, you’ll have to choose your subscription, resource group, VNet, subnet, a name for your gateway, and high availability/load balancing settings.
If you’ve accidentally chosen a region where the VNet data gateway is unavailable, you will get the error “Invalid request”. (Helpful, I know.)
Using Your VNet Data Gateway
You’ll need to create a data source in Power BI, just like you would if you were using an On-Premises data gateway. But you’ll need to select Virtual Network Data Gateway at the top before you enter your connection info. Your new VNet data gateway should be available for selection in the list.
The VNet data gateway can be used for imported or DirectQuery connections. If you want to enable SSO via Azure AD for DirectQuery queries, you can. Otherwise, the credentials you enter on this connection will be used to connect for imported dataset refresh or DirectQuery.
After you publish a dataset to PowerBI.com that connects to the data source you just defined in Connections, you’ll need to configure the dataset to use that connection.
In the dataset settings, when you expand Gateway Connections, you should see the data source listed. There will be a drop-down box labeled “Maps to:”. Use that to associate the data source with the previously created connection.

Then you are all set.
While there are some limitations, and it’s unfortunate that it only works with Premium/PPU/embedded workspaces at the moment, it’s nice not to have to manage a virtual machine in Azure just to allow Power BI to connect to my Azure SQL database via a private endpoint.
